Recruiting App Installation Guide
Recruiting App installs directly into your Salesforce org from an install link. It is not installed from AppExchange.
1. Open the install link
Log in to Salesforce as a System Administrator, then open the link for your org type:
- Production or developer org: https://login.salesforce.com/packaging/installPackage.apexp?p0=04tNS000000bVMbYAM
- Sandbox: https://test.salesforce.com/packaging/installPackage.apexp?p0=04tNS000000bVMbYAM
If your org uses My Domain and the link asks you to log in again, replace login.salesforce.com (or test.salesforce.com) with your My Domain address. The same links are on the Recruiting App page. The same link upgrades an org that already has an earlier version; your data and settings are kept.
2. Before you install
Upgrading from 1.26 or earlier? Required first from 1.26 or earlier: set Interview sharing to Private.
- Go to Setup, then Sharing Settings, and click Edit.
- For Interview, set Default Internal Access (and Default External Access, if shown) to Private.
- Click Save and wait for the sharing recalculation email before you upgrade.
Why: 1.27 makes interviews private and shares each one with its interviewer. Salesforce never changes your sharing defaults during an upgrade, so if Interview is still Public Read/Write the upgrade stops with “Missing Organization Feature: cga__Interview__c.Sharing” and nothing is installed.
After the change, users see the interviews they own, the ones where they are the interviewer, and those owned by people below them in the role hierarchy. New installs need nothing: they get Private automatically.
If Interview shows “Controlled by Parent”
Orgs that first installed Recruiting App early (around version 1.11 or older) still have two retired fields: Interview → Candidate (master-detail) and Candidate → Number of Interviews (roll-up summary). Because of the master-detail field, Sharing Settings shows Interview as “Controlled by Parent”, you cannot set it to Private, and the upgrade fails with the same error. Do this instead:
- Back up your interview links. In Data Loader or Workbench, export Id, cga__Candidate__c and cga__CandidateRef__c from Interview (cga__Interview__c). Wherever CandidateRef is blank, update it to the Candidate value. Reports and the app use CandidateRef, so no data is lost.
- Setup → Object Manager → Candidate → Fields & Relationships: delete Number of Interviews. It is a roll-up summary the app no longer uses.
- Setup → Object Manager → Interview → Fields & Relationships: delete Candidate (the master-detail field). Keep CandidateRef. Do step 2 first; Salesforce blocks this delete while the roll-up exists.
- Setup → Sharing Settings → Edit: set Interview to Private for both default internal and external access, Save, and wait for the “sharing recalculation complete” email.
- Install 1.27.
- Dynamic dashboards limit. If the installer stops with "You reached the limit for dashboards run as the logged-in user", temporarily change one existing dashboard from "Run as logged-in user" to a specific user, then install again.
- Duplicate rules on Candidate. If you see "cga__Candidate__c.Rule_for_Duplicate_Candidate: SortOrder must be in sequential order from 1", delete your own duplicate rules on the Candidate object first. The app ships a rule with sort order 1; you can add yours back afterwards with a higher sort order.
- Test in a sandbox first if you are upgrading a production org with customizations.
3. Choose who gets access
On the install screen, accept the terms and choose Install for Admins Only. You give everyone else access afterwards with the app's permission sets (Recruiting App Admin, Recruiter, Hiring Manager, Employee and Site Guest User), which is easier to manage than profile access.
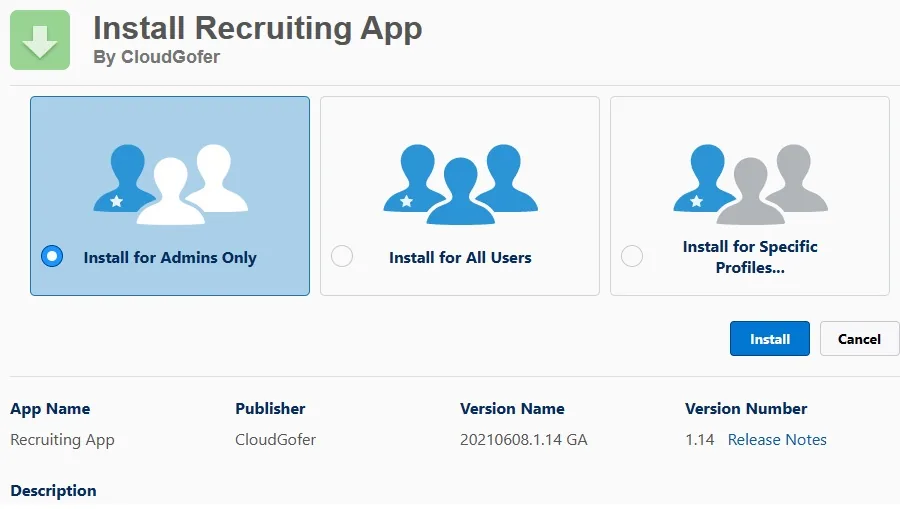
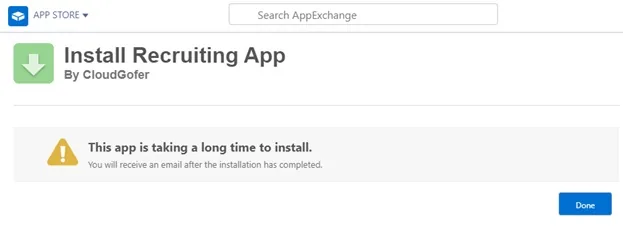
Click Install. Installation can take a few minutes. If Salesforce says it will email you, wait for the "Package Recruiting App Install Successful" email.
4. After you install
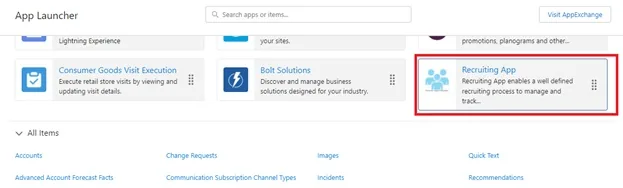
- Open the App Launcher, click View All and open Recruiting App. You can drag it to the top of the list so it is easy to find.
- Open the Getting Started tab and work through its setup checklist.
- Assign the permission sets to your users (see user roles).
- Configure the app with the Recruiting App Admin Guide.
Need help?
Open a case through the support form or email support@cloudgofer.com with your org ID (Setup, Company Information).